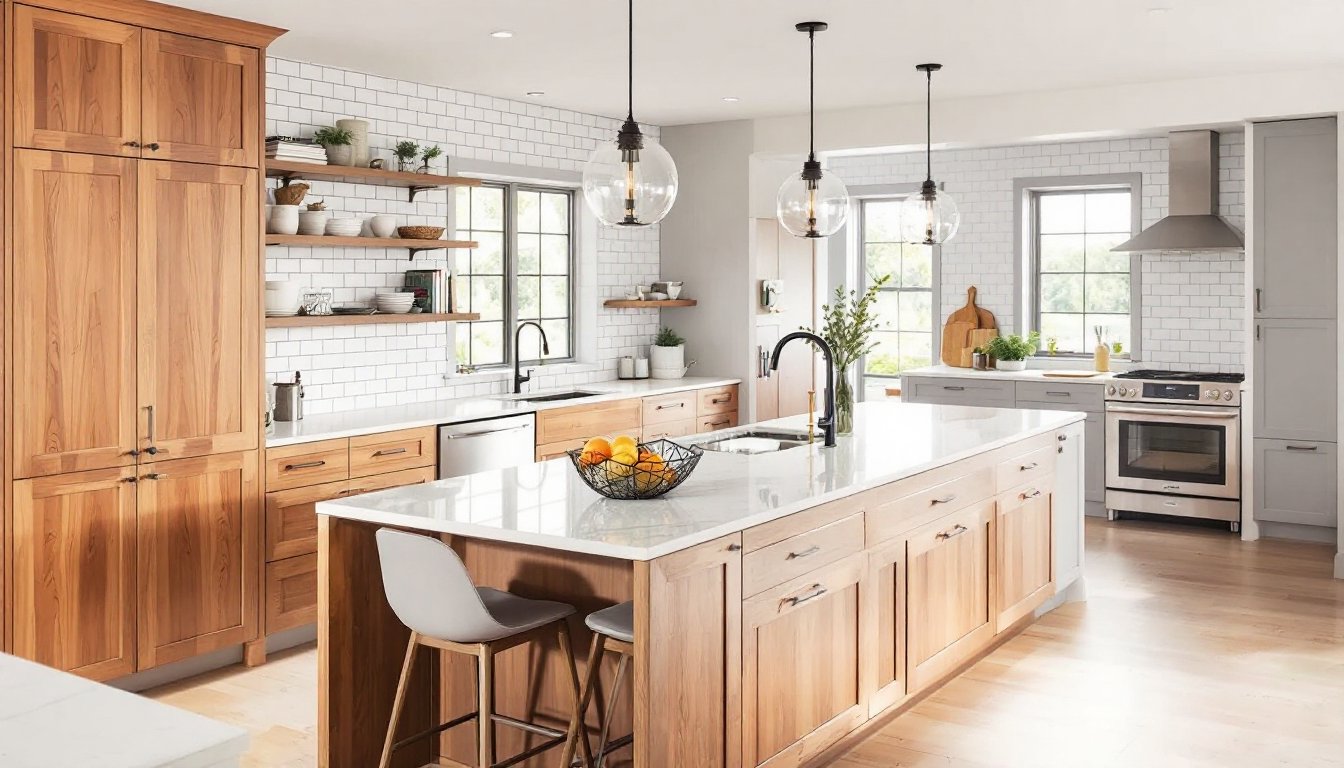
A kitchen island table with storage solves a fundamental problem: most kitchens lack workspace and cabinet room. Whether you’re cooking for a family or hosting weeknight gatherings, an island combines meal prep surface, casual seating, and hidden storage in one compact footprint. The right island can transform a cramped kitchen into a functional, organized hub, and you don’t need a full renovation to make it happen. This guide walks you through the options, shows you how to pick the right fit for your space, and covers what it takes to install one properly.
Table of Contents
ToggleKey Takeaways
- A kitchen island table with storage combines meal prep space, casual seating, and hidden storage in one compact footprint, solving the dual problems of limited workspace and cabinet room.
- Choose between open shelving islands (affordable and visually airy), closed cabinet islands (maximum storage and clutter-hiding), or hybrid designs (combining both for balanced functionality and display).
- Measure your space carefully—ensure at least 36–42 inches of walking clearance around the island and choose dimensions (typically 24–48 inches deep) that fit your kitchen’s layout without disrupting the work triangle between stove, sink, and fridge.
- A well-designed kitchen island table with storage can add perceived resale value to your home, especially in open-concept kitchens where it serves as both a functional hub and gathering spot.
- Islands with plumbing or electrical utilities require professional installation and permits, while freestanding islands are DIY-friendly but must be properly leveled and anchored to prevent tipping.
Why Kitchen Island Tables With Storage Are a Game-Changer
A dedicated island solves multiple problems at once. First, it adds serious counter space without eating into wall real estate, critical in smaller kitchens where every square inch matters. Second, storage integrated into the island keeps everyday items (utensils, cookbooks, dry goods, small appliances) within arm’s reach while keeping them off countertops. Third, islands create a natural gathering spot: dinner prep becomes a social activity instead of a solo grind.
There’s also the resale angle. A well-installed island with thoughtful storage typically adds perceived value to a kitchen, especially in homes where the kitchen is the main living zone. Even a modest island beats a bare, undersized kitchen when buyers are comparing properties.
The flexibility factor matters too. Unlike built-in cabinets, many islands can be relocated or reconfigured later, which is handy if your layout evolves or you move. That said, some islands are semi-permanent or fully permanent depending on plumbing, electrical, and anchoring. We’ll touch on that in the setup section.
Types of Kitchen Island Tables With Storage
Not all islands are built the same. Understanding the main categories helps you narrow down what fits your kitchen’s footprint, style, and storage needs.
Open Shelving Islands
Open shelving islands expose baskets, cookbooks, or attractive dishware, making them feel airy and approachable. They work well in smaller kitchens because they don’t visually block sightlines the way closed cabinets do. The trade-off: everything on display needs to look intentional, and dust settles faster. You’ll want to rotate décor seasonally and keep shelves from looking cluttered.
Open islands often pair a lower shelf (usually 12–18 inches deep) with a work surface above. Some designs add a seating overhang so you can tuck stools underneath. They’re also simpler to build if you’re going the DIY route, basic shelving brackets, a work surface, and some legs are the core components. Costs run lower than fully enclosed cabinets, typically starting under $400 for a modest DIY build using 2×4 lumber and plywood.
Closed Cabinet Islands
Full cabinet islands hide clutter and maximize usable storage volume. Drawers, cupboards, and enclosed shelves keep pots, pans, small appliances, and non-pretty items out of sight. They’re ideal if your kitchen is open-concept: hiding storage keeps the whole space from feeling crammed with stuff.
Closed islands demand more precision in construction, face frames, inset or overlay doors, drawer slides, and hinges all need proper alignment so doors close smoothly and drawers glide without binding. If you’re building one, expect to spend time on finish carpentry. Pre-made cabinet modules (available from big-box retailers) speed things up, though they’re less customizable than building from scratch. Semi-custom cabinet kits run $600–$1,500 depending on depth, width, and materials. Fully custom built islands from a cabinet maker can exceed $2,000.
Hybrid Islands With Mixed Storage
Many of the best real-world islands blend open and closed storage. Maybe the front facing the seating area has open shelves for cookbooks and baskets, while the back (facing the stove or wall) has closed cabinets for pots, pans, and small appliances. Or the lower section is all drawers and cupboards, with open shelving at eye level. This approach gives you the best of both: visual interest and display, plus functional hiding spots for the unglamorous stuff.
Hybrid designs also let you tailor storage to how you actually cook. If you grab pots constantly, they go in easy-access cabinets. If you bake, you might dedicate a closed section for dry goods and baking sheets. Open shelves hold items you reach for daily. Building a hybrid island takes more thought upfront, but the result is typically the most user-friendly. A kitchen island table with storage that blends both approaches requires careful measurement and planning to ensure proportions look balanced.
How to Choose the Right Island for Your Kitchen
Picking the wrong island is an expensive mistake. Measure twice, think about your workflow, and honestly assess how much storage you actually use.
Start with dimensions. A functional island needs at least 2 feet of clearance on all sides so you can open cabinets and drawers without obstruction. Most building codes require 36–42 inches of walking space around islands. If your kitchen is tight (under 100 square feet), a narrow island (24 inches deep by 36–48 inches long) is better than forcing an oversized one that chokes the room. In larger kitchens, you can afford islands 36–48 inches deep with seating for 3–4 people.
Consider your layout. Is the island parallel to your counter runs, or does it float in the center? Parallel layouts work better in galley-style kitchens and are easier to install if you want to run plumbing or electrical. Floating islands create a more open feel but demand careful planning around traffic flow. Look at your work triangle (stove, sink, fridge), the island shouldn’t interrupt efficient movement between these three points.
Think about storage type. Do you prep a lot and need deep drawers for large sheet pans and cutting boards? Do you entertain and want display shelves for glassware? Are you drowning in small appliances? Your actual use dictates whether you need more drawers, shelves, or cabinets. Walk through a typical cooking day and note what you’d want within arm’s reach of the island.
Material and style matter. A sleek modern island with handleless drawers and waterfall countertop edges demands precision carpentry or a custom order. A farmhouse-style island with open shelves and a butcher-block top is more forgiving and DIY-friendly. Whatever you choose, make sure it coordinates with your existing cabinets and finishes. Mismatched woods and styles can make a kitchen feel disjointed. If you’re unsure, neutral finishes (white, gray, natural wood tones) age better than trends.
Seating: Do you want stools or just a work surface? Seating adds 15–18 inches to the footprint and requires a specific overhang (15 inches is standard so knees fit underneath). Kids’ assignments station, quick meals, or just somewhere for a guest to perch, clarify the purpose so you build the right height and depth.
Installation and Setup Tips
Installation difficulty depends on whether your island is freestanding (moves anytime), semi-permanent (doesn’t have utilities but is anchored), or permanently tied into plumbing and electrical.
Freestanding islands are the simplest. You build or buy one, position it, and go. Make sure the floor is level, shims underneath legs prevent rocking. If your island has a seating overhang or upper shelves, secure it to the floor or base with appropriately rated fasteners so it doesn’t tip if someone leans hard on an overhang. This matters, especially if kids are around. Use wood shims to level the base, then L-brackets or lag bolts to anchor if needed.
Semi-permanent islands might include a recessed toe kick and anchoring to floor joists or floor bolts for stability. Measure your floor carefully and use a level (a 4-foot is ideal) in multiple directions before fastening. If the floor is uneven by more than ½ inch over the island’s length, you have an underlying problem, address it first, don’t just shim it out.
Islands with plumbing and electrical require more planning. Water lines, drain stacks, and electrical runs need to be roughed in before the island is installed. This almost always requires a plumber and electrician because codes are strict about how utilities are run. Permits are required in most jurisdictions. The island’s location must be finalized before rough-ins, so change your mind late in the game and you’re re-running expensive utilities. If this is your first island build, hiring professionals for utility rough-in is money well spent, mistakes here are costly.
Countertop installation is the last step. If you’re using a pre-made countertop (laminate, solid surface, or quartz), it bolts or adheres to the base. Granite or marble counters require professional installation and proper support brackets underneath. A butcher-block or wood countertop needs sealing and periodic maintenance, discuss expectations upfront if you’ve never maintained wood surfaces.
Building your own island from a plan (like free kitchen island woodworking plans) requires basic carpentry: a table saw or miter saw for straight cuts, a drill for pocket holes or screws, a sander for finishing, and a finish nailer if you’re adding trim. Expect to spend a weekend on a simple build, longer if you’re adding cabinet doors. Measure the space, account for baseboard height and any appliances nearby, and always build slightly narrower than your maximum width, better to shim in space than to find out your island doesn’t fit through the doorway.
Safety reminders: Wear safety glasses when cutting. Use a dust mask when sanding (plywood dust contains adhesives). If you’re staining or finishing, work in a ventilated space and wear nitrile gloves to protect your hands. Secure power tools properly and keep hands clear of blade paths. If you’re unsure about any electrical or plumbing work, beginner woodworking projects and home repair tutorials can walk you through basics, but don’t guess on code-regulated work.