If you grow your own grains, keep backyard chickens, or practice small-scale farming on your property, you know that proper grain storage bins are non-negotiable. Whole grains, seeds, and animal feed spoil quickly when exposed to moisture, temperature swings, and pests, and that means wasted time, money, and effort. A grain storage bin solves this problem by creating a sealed, controlled environment that keeps your harvest fresh for months. Whether you’re preserving homegrown wheat for flour, storing chicken feed, or stockpiling seeds for next season, understanding your bin options and how to maintain them properly will save you headaches and protect your investment. This guide walks you through everything from selecting the right bin type to installation and upkeep.
Table of Contents
ToggleKey Takeaways
- Proper grain storage bins protect your harvest from moisture, pests, and mold by maintaining a sealed, controlled environment that extends shelf life from weeks to months or years.
- Choose between metal bins (galvanized steel or aluminum) for durability and long-term use in humid climates, or plastic bins (food-grade polyethylene) for affordability and easy portability in smaller-scale storage.
- Prepare your site with a level, well-drained location and a compacted gravel or concrete foundation to prevent water pooling and pest entry around your grain storage bin.
- Maintain your grain storage bin monthly by inspecting seals and gaskets, checking for rust or damage, and sealing any gaps with steel mesh to keep rodents out.
- Store grain at 50–70°F with 12–15% moisture content, use food-grade desiccant packages in humid climates, and allow grain 24–48 hours to acclimate with a slightly cracked lid before sealing fully.
Why Grain Storage Bins Matter for Home Gardeners and Small Farmers
Grain and seed storage isn’t just convenience, it’s protection. Without proper containment, moisture creeps in, fungi and mold grow unchecked, and insects establish colonies that render your crop inedible or unusable. A quality grain storage bin maintains consistent temperature and humidity, seals out pests, and extends shelf life from weeks to months or even years, depending on the grain type and storage conditions.
For homeowners with modest harvests, a single bin can handle an entire season’s worth of grain. Small farmers managing multiple crops or large quantities benefit from multiple bins or larger capacity models. The right bin also keeps pests like rodents, weevils, and moths from contaminating your stored feed or grain, which is especially critical if you’re feeding livestock or using the grain for household milling. Beyond practical concerns, organized, sealed grain storage frees up space in your garage or shed and creates an inventory system you can actually manage.
Types of Grain Storage Bins and How to Choose the Right One
Metal vs. Plastic Storage Options
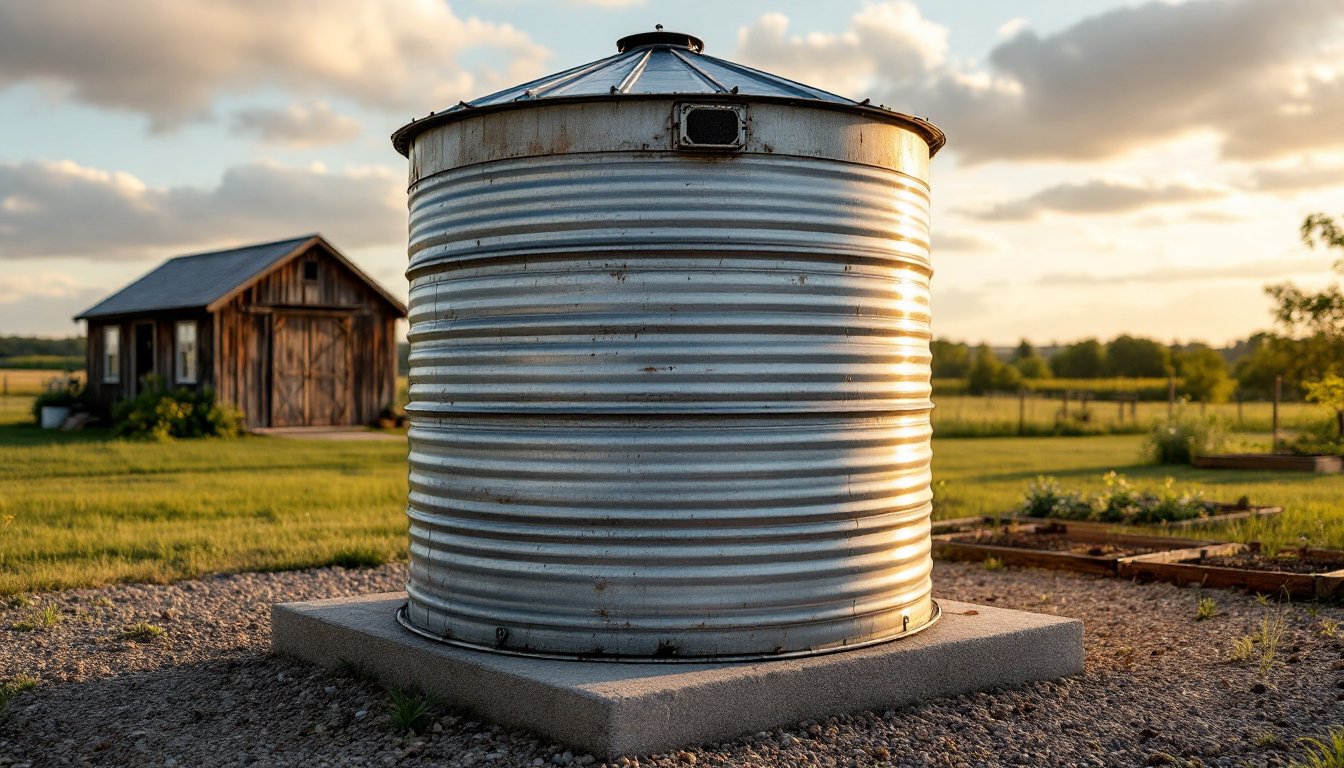
Metal bins, typically galvanized steel or aluminum, offer durability and longevity. They resist dents better than plastic, don’t degrade under UV exposure, and provide superior pest protection when sealed properly. A 20-bushel galvanized steel bin with a screw-down lid costs $150–$300, while larger models (50+ bushels) run $400–$800. Metal bins work well in humid climates because they’re less prone to condensation issues than plastic.
Plastic bins are lightweight, affordable, and easier to move around. Food-grade polyethylene models rated for grain storage are available in sizes from 5 gallons to 50+ gallels. A 55-gallon food-grade plastic barrel (roughly 7 bushels) runs $30–$60, making them ideal for small-scale storage or experimentation. Plastic bins do degrade under intense sunlight, so place them indoors or under cover. They also don’t insulate temperature fluctuations as well as metal.
For most homeowners, the choice comes down to: capacity, climate, and durability. A gardener in Arizona storing seeds might prefer plastic and keep bins in a cool shed. A small farmer in the Midwest storing bulk grain for livestock will get more value from a metal bin that lasts 20 years. Consider where you’ll place the bin, indoors stays cooler and darker, which extends grain freshness. Outdoor placement demands metal with a tight, lockable lid to resist weather and pests.
Other options include wooden grain bins (custom-built from timber, labor-intensive but rustic) and canvas or fabric storage bags (temporary, affordable, but less protective). Most homeowners stick with metal or plastic because they’re commercially available, affordable, and proven. When sizing your bin, account for future storage, a bin that’s 70% full works better than overstuffed, which restricts air circulation and increases mold risk.
Installation Essentials: Getting Your Grain Storage Bin Ready
Installation doesn’t require a permit in most jurisdictions (verify locally), but placement and preparation are critical. Start by choosing a level, well-drained location away from downspouts and grade low-spots where water pools.
Prep the site:
- Clear the area of debris and vegetation. Rodents and insects hide in grass near bins.
- Lay a foundation of compacted gravel or concrete pad (4–6 inches deep) to elevate the bin above ground and prevent water pooling underneath.
- If using gravel, compact it firmly so the bin sits stable: uneven settling causes lid seals to fail and allows pests entry.
- For a permanent setup, pour a concrete slab at least 4 inches thick, extending 6 inches beyond the bin’s footprint.
Assembly and sealing:
- Follow the manufacturer’s instructions for your specific bin model.
- Inspect all seams, hinges, and the lid gasket before first use: look for cracks or warping that compromise the seal.
- If using a screw-down or clamp-style lid, hand-tighten all fasteners evenly to ensure a uniform seal, cross-tighten (opposite sides) to avoid binding.
- Install a screened vent if the bin doesn’t have one: grain breathes slightly as it acclimates to storage, and airflow prevents condensation buildup inside.
- Position the bin so the door (if hinged) faces away from prevailing winds and rain.
Safety note: Never store grain bins near septic systems, wells, or buried utilities. Call before you dig. If building a custom wooden bin, ensure the interior is sealed or lined with food-grade material: untreated wood absorbs moisture and harbors mold spores. Use nitrile gloves when handling gaskets or sealants, and wear a dust mask if opening bins of grain flour or fine seeds.
Maintenance Tips to Keep Your Grain Fresh and Your Bin Secure
Once your grain storage bin is installed and filled, regular maintenance ensures your harvest stays fresh and your bin stays pest-proof.
Monthly checks:
- Inspect the lid seal and gasket for cracks, hardening, or mold growth. Replace gaskets every 3–5 years or sooner if degraded.
- Check the exterior for dents, rust (on metal bins), or UV damage (on plastic bins).
- Look around the bin’s perimeter for rodent droppings, chewing marks, or entry holes. Seal any gaps immediately with caulk and steel mesh, rodents cannot chew through steel.
Temperature and humidity:
Grain stays freshest between 50–70°F and 12–15% moisture content. In hot, humid climates, this is challenging: consider adding a desiccant package (calcium chloride or food-grade drying pellets) inside the bin to absorb excess moisture. Replace desiccants every 3–6 months. If your area experiences temperature swings, shade the bin or paint it white to reduce heat absorption.
Pest control:
Seal the bin completely when not accessing grain, every opening is an invitation. If you notice insect activity inside (weevils, moths), remove affected grain immediately and treat the bin interior with food-grade diatomaceous earth (a natural powder that damages insect exoskeletons). Avoid chemical pesticides in bins storing grain for human consumption unless they’re specifically rated for grain. For livestock feed, you have more flexibility, but always read labels.
Grain acclimation:
When you first store grain, let it acclimate to the bin’s internal temperature for 24–48 hours with the lid cracked slightly. This allows condensation to evaporate and prevents trapped moisture. After acclimation, seal the bin fully. If you’re storing grain long-term (over a year), monitor it quarterly for mold, off-odors, or insect activity. Properly stored whole grains (wheat, oats, barley) last 5–10 years: flour and cracked grain last 6–12 months. Recent home design and gardening improvements often include storage solutions that protect homegrown harvests. Consult your bin’s manual for specific acclimation and storage windows for your grain type.
Conclusion
Choosing, installing, and maintaining a grain storage bin is straightforward when you know what to expect. Assess your capacity needs, climate, and budget, then pick between metal (durable, best for bulk) or plastic (affordable, lightweight). Prep your site properly, seal the bin carefully, and commit to monthly checks. With these steps, your grain stays fresh, pests stay out, and your investment works for years.